Leading precision measurement specialist, Optical Metrology Services (OMS), has launched a brand new inspection service to analyse the critical internal girth features of oil and gas pipeline welds in the firing line.
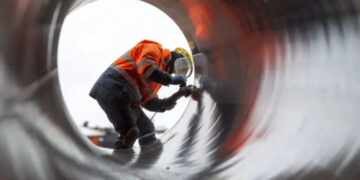
This new provision will improve inspection accuracy and quality, thus increasing firing line efficiency. Specifically designed to blend seamlessly with pipe weld processes, Auga combines high-resolution video camera technologies with laser scanning capabilities to gather detailed 360° pipe geometry data from within the entire girth weld. Unlike other inspection tools, Auga can be attached directly to an internal line-up clamp (ILUC) and configured to report on a wide variety of attributes.
Compared to more traditional weld inspection processes, which can take up to an hour to complete, Auga collects the data in less than two minutes, saving valuable time and allowing weld defects to be rapidly qualified.
Hugh Davies, director of client solutions at OMS, comments: “With many oil and gas companies now requiring both visual and laser-based weld inspection processes to meet stringent quality standards, capturing in-depth data in the pipe firing line is essential.
“Auga not only provides a non-destructive solution to guarantee both efficient pipe welding and fast qualification of root weld profiles, but also provides a simple ‘green’ or ‘red’ light to indicate whether a weld is qualified – immediately notifying the inspection team and allowing remedial measures to be taken if necessary.â€
To provide further insight, Auga can be integrated with OMS’ WeldAnalysis software. WeldAnalysis is brand new software designed to capture, analyse and report the results. Processing data from the Auga™ measuring head, the software analyses up to 2,000 scanned profiles along with multiple overlapping images, developing an accurate 3D topographical map to accurately report on a variety of weld attributes. The operator can even set predetermined specifications for features such as root penetration, undercut and ID re-entrant angle, identifying areas that are out of specification for further investigation.
Hugh continues: “A tool that quickly collects weld measurement data must be paired by simple and efficient reporting software. This is why we developed WeldAnalysis – a huge step forward in precision measurement technology. Providing a straightforward process to analyse defects in a very short timeframe, WeldAnalysis guarantees fast, accurate analysis in a clear, graphical format.â€


